Lesson 1,
Topic 1
In Progress
Scratch Script
Programming the Robot
Congratulations on reaching this far, evivers! You’ve successfully completed all the previous stages with flying colours! This part of the task, however is where your true skills will be tested. So, put on your thinking + understanding caps and let’s get started!
We’ll divide the entire script into 2 parts:
- Scripts for movements in different directions
- Main Script
Scripts for moving the robot in different directions
These are the same as that written in the Smartphone Controlled Robot mission. They are:
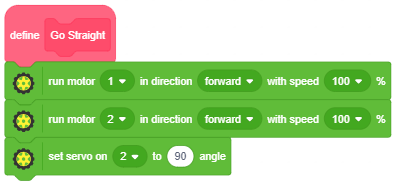
- Go Straight
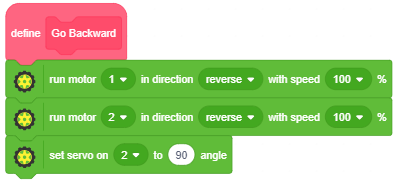
- Go Backward
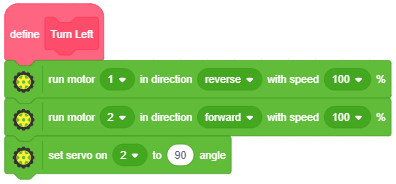
- Turn Left
- Turn Right
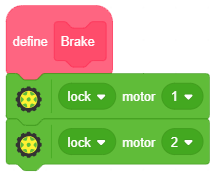
- Brake
Below are the scripts:

There is one more addition to the list: Take Reverse
Follow the steps below to write its script:
- Go to the Variables palette and create a block named Take Reverse in a manner similar to the one used in the Smartphone Controlled Robot.
- Drag and drop the Go Backward block below the Take Reverse definition hat block.
- Go to the Control palette and drag and drop the wait () secs block below the GoBackward block.
- Go to the Operators palette and drag and drop the () * () block inside the space in the wait () secs block.
- Next, go to the Variables palette and create a variable named Delay Time. Then, drag and drop the Delay Time variable block in the first space of the () * () block and write 1 in the second space.
- Go to the Variables palette and drag and drop the Turn Left block below the wait () secs block.
- Go to the Control palette and drag and drop another wait () secs block below the Turn Left block.
- Repeat steps 5 and 6; this time write 3 in the second space of the () * () block.
Below is the complete script: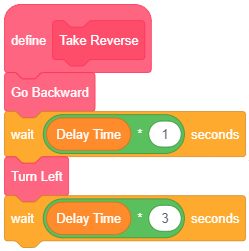
Main Script
Follow the steps below to write the script:
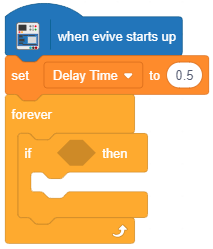
- Go to the evive extension and drag and drop the when evive starts up block in the scripting area.
- Go to the Variables palette and drag and drop the set () to () block below the when evive starts up block. select Delay Time from the drop-down menu and in the second space write 0.5.
- Next, go to the Control palette and drag and drop the forever block below the set () to () block.
- Then, drag and drop the if block inside the forever block.
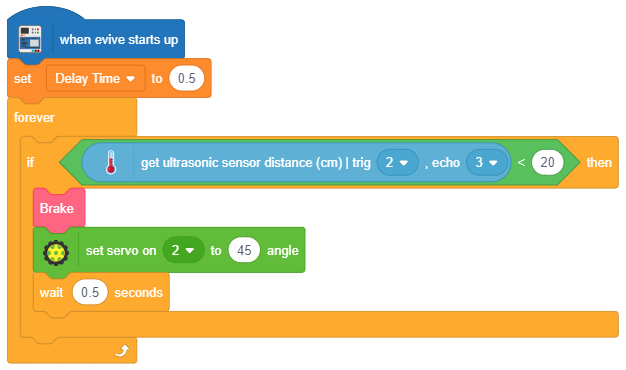
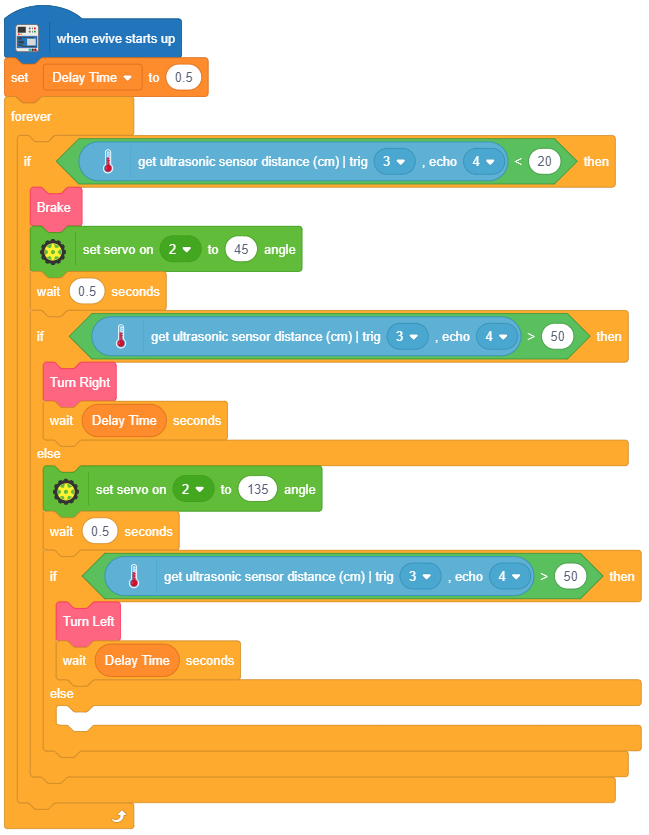
- Now comes the time to start looking for obstacles. First, we need to check for the obstacles right in front. As of now, let’s consider that the robot is already moving straight ahead; hence we’ll check for obstacles in front at a distance less than 20cm. If obstacles are present, the robot will have to halt. In the space in the if arm of the if block, drag and drop the () < () block from the Operators palette. Go to the Robots palette and drag and drop the get ultrasonic sensor distance (cm) | trig () echo () from the Sensors extension in the first space of the () < () block; select pin 3 from the first drop-down menu and pin 4 from the second drop-down menu. In the second space of the () < () block, write 20.

- Go to the My Blocks palette and drag and drop the Brake block below the if arm of the if block. Go to the Actuators extension and drag and drop the set servo on () to () angle block under the brake block; set the servo pin as 2 and the angle as 45°. Below this block, drag and drop the wait () secs block from the Control palette and set the time as 0.5 secs. The wait () secs block adds a delay that allows the servo to stabilize.
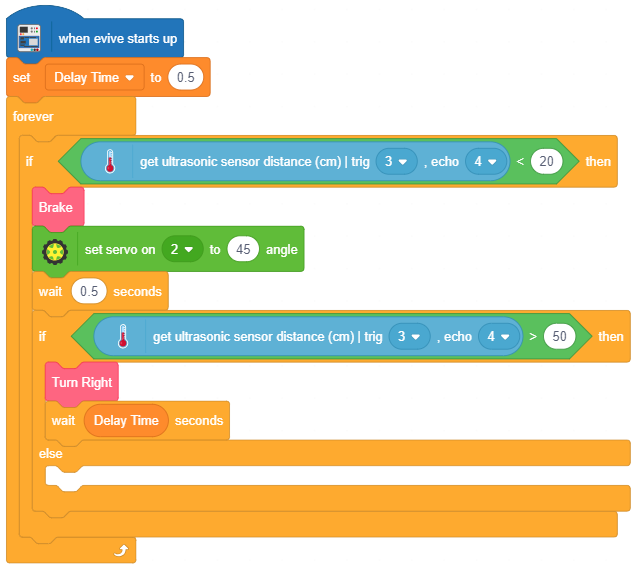
- Go to the Control palette and drag and drop the if-else block below the wait () secs block. In the space in the if arm of the if-else block, drag and drop the () > () block from the Operators palette. Go to the Robots palette and drag and drop the get ultrasonic sensor distance (cm) | trig () echo () block from the Sensors extension in the first space of the () > () block; select pin 3 from the first drop-down menu and pin 4 from the second drop-down menu. In the second space of the () > () block, write 50.
- Go to the My Blocks palette and drag and drop the Turn Right block below the if arm of the if-else block.
- Below this block, drag and drop the wait () secs block from the Control palette, and in the space of this block, drag and drop the Delay Time variable block, as shown in the main script.
- Go to the Actuators extension and drag and drop the set servo on () to () angle block under the else arm of the if-else block; set the servo pin as 2 and the angle as 135°. Go to the Control palette and drag and drop another wait () secs block below the set servo on () to () angle block; set the time as 0.5 secs.
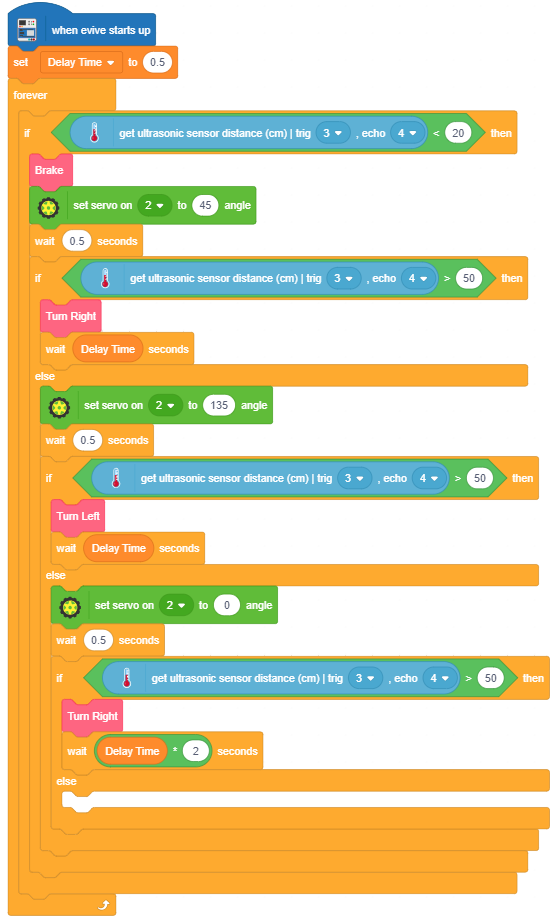
- Go to the Control palette and drag and drop the if-else block below the wait () secs block and repeat step 7.
- Repeat step 8; this time drag and drop the Turn Left block below the if arm of the if-else block.
- Repeat step 9.
- Repeat step 10; this time set the servo angle as 0°.
- Go to the Control palette and drag and drop the if-else block below the wait () secs block and repeat step 7.
- Repeat step 8; this time drag and drop the Turn Right block below the if arm of the if-else block.
- Repeat step 9, this time, instead of dropping the Delay Time variable block in the space in the wait () secs block, first drag and drop the () * () block in the space; in the first pace of the () * () block, drag and drop the Delay Time variable block. Write 2 in its second space. We’re using the multiplier operator block to increase the delay time because this time, the servo will turn 90° instead of just 45° as in the previous cases.
- Repeat step 10; this time set the servo angle as 180°.
- Go to the Control palette and drag and drop the if-else block below the wait () secs block and repeat step 7.
- Repeat step 12.
- Repeat step 17.
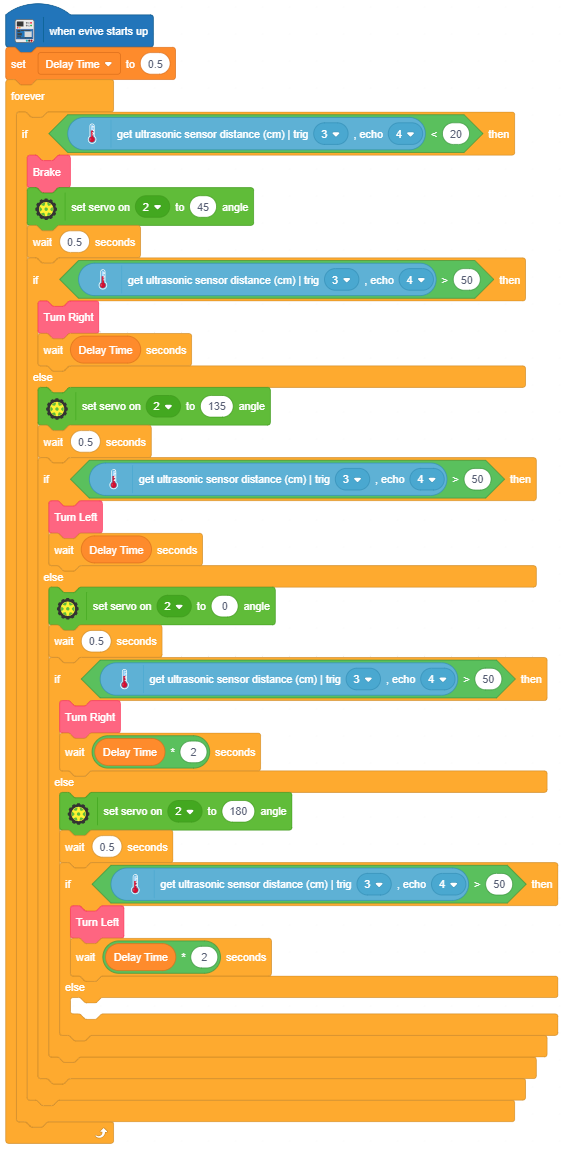
- This time, below the else arm of the if-else block, drag and drop the TakeReverse block from the Data&Blocks palette.
- Towards the end of the script, just inside the forever block, drag and drop the GoStraight block from the Data&Blocks palette.
- Below this block, drag and drop the wait () secs block from the Control palette, and set the time as 0.2 secs.
Below is the complete script:
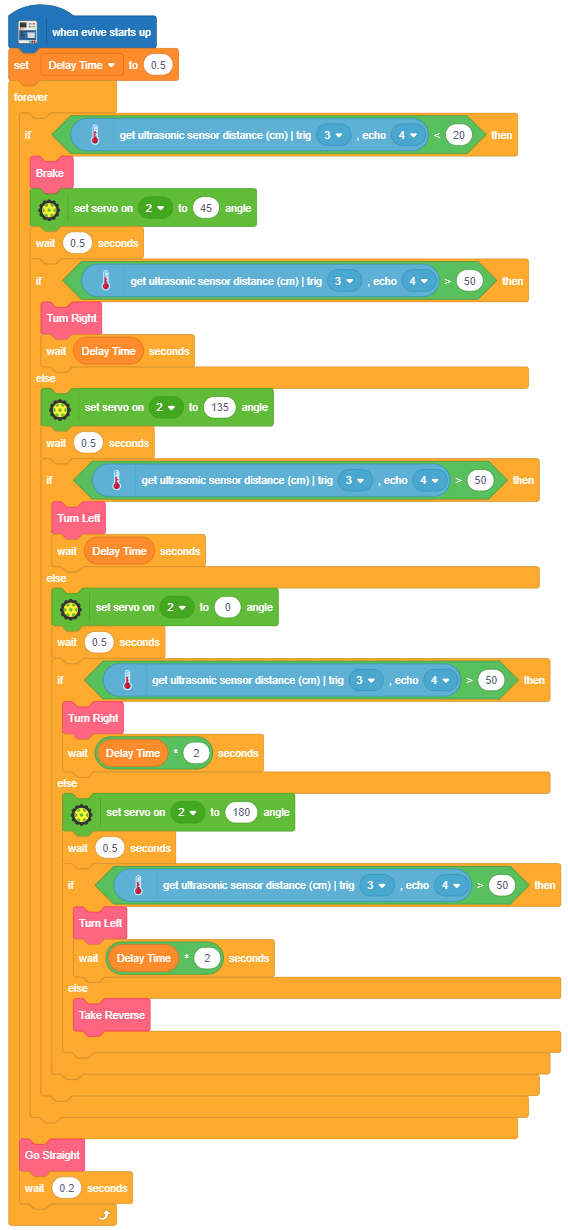
Whew! That was one looong script! No obstacle can stop your robot from completing its mission now! On to the next part, evivers!
Good luck! 😎